Despite our best efforts, and “I’ll do that next week” promises, cleaning our coffee maker just didn’t get done. Now, don’t get me wrong; we made sure to clean the coffee pot daily. However, the coffee maker reservoir and machine was another story. It was one of those “I’ll do it soon” type things and was often neglected. That was until I read a particularly disturbing household germ study stating that the coffee machine reservoir is one of the dirtiest things in the house. The coffee maker is a breeding ground for grossness, especially when it comes to mold and yeast. The study honestly scared us a little, so this got us on a cleaning campaign of the entire house – including all of our small kitchen appliances.

Other small appliances: How to Clean an Electric Kettle
Cleaning a coffee maker is relatively simple to do and doesn’t take a ton of time. As always, I am here to remind you to take a quick peek at your coffee maker’s manufacturer cleaning recommendations before you begin.
Here are a few popular coffee maker manufacturer manuals for your reference. If you don’t see yours here, you can do a quick Google search for your brand’s manual.
This guide is geared toward the daily and maintenance cleaning of your coffee maker. If you are looking to descale mineral build-up from your machine, the following article will tell you exactly how to go about it.
Cleaning the Exterior and Removable Parts
There are a few parts of the coffee maker you should be cleaning on a daily basis: the coffee pot, the warming plate, and the filter holder. Also, use a clean rag to give the exterior body a quick wipe down.
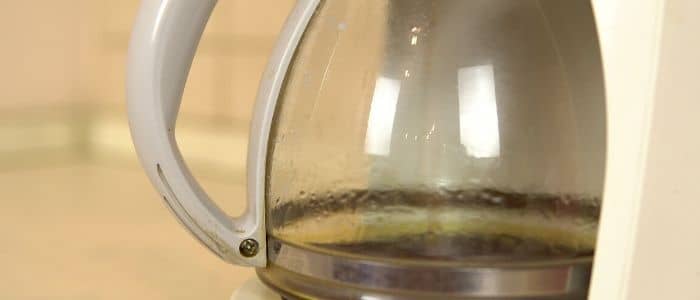
Coffee Pot
After each use, turn the pot off and let it cool, especially if its glass. You can easily break the glass if you put it under cold water when it’s hot. After the pot cools, empty the leftover coffee and rinse it out. Use a clean rag or scrub brush and dish soap to clean the coffee pot thoroughly. If you need some extra cleaning power, use a bit of lemon juice, salt, and ice to clean out any burnt-on coffee lingering in the bottom of the pot.
Cleaning a Burnt Coffee Pot
So you accidentally left the empty coffee pot sitting on the burner for too long, and now you have coffee baked to the bottom of the carafe? No big deal. It’s easier to remove than you may think. I always turn to a tried-and-true hack that I learned while waiting tables. It’s been many years since then, but this method hasn’t ever failed me.
You’ll Need:
If you choose to use lemon slices, there is a bit of prep work to cut up the lemon. Lemon juice works the same and is more convenient if you are looking at time as a factor.
! ! NOTE BEFORE STARTING ! !
Do not start this process if the glass of your coffee pot is still hot. As most of us already know, hot glass will crack or break if exposed to cold – as in the ice that we will be using – it is wise to let the glass cool completely. Better safe than sorry.
There aren’t specific measurements for this recipe, and I usually eyeball it, so I’ll give you approximate amounts.
- Add about 2 tablespoons of lemon juice or a few slices of fresh lemon and about a tablespoon of salt to the coffee pot.
- Fill the bottom of the pot with ice. Not too much, you want the ice to move freely.
- In a circular motion, swirl the contents of the pot around.
- Keep swirling until you don’t see any more black on the bottom of the pot.
- Once done, dispose of the contents inside the pot. Don’t rinse yet.
- If the opening is big enough or if your hand is small enough, you may use a paper towel or sponge to wipe off any remaining staining. The leftover salt will help you out.
- If you can’t reach your hand inside, you can use a scrub brush to scrub away residue. It shouldn’t take much effort and should easily come off.
- When finished, wash the pot as normal.
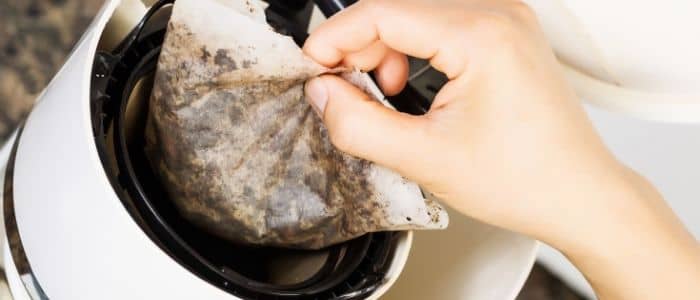
Filter Holder
If the filter holder is removable, it’s important to wash that daily as well. Coffee leaves a residue that can stain the holder and harbor bacteria. There are also loose coffee grinds that often end up in the filter holder that need to be removed. Since you are already cleaning the coffee pot, just give the filter holder a quick scrub while you’re at it. Rinse and set out to dry in a rack or on a towel before placing it back into the machine. Remember, germs love moisture.
Cleaning the Exterior
The exterior body of the coffee maker also tends to get neglected. Splashes and spills happen, so it’s important to take the time to wipe the entire body down. The warming plate and backsplash are two areas that will need the most attention. No worries, cleaning this up only takes a minute or two. Use a bit of dish soap and water, or even spray some vinegar on a rag, and you will be good to go.
You’ll Need:
Optional items:
- Unplug the coffee maker before cleaning.
- Wet the sponge and place a few drops of dish soap on it. If using vinegar spray, carefully spray the surface.
- Wipe down the outside surface of the machine, and pay attention to the warming plate and backsplash area.
- Once the entire machine has been wiped down, if soap residue remains, rinse the sponge well and wipe off the excess soap.
- Dry the machine with a clean towel and plug it back in.
That’s it. If you find you are having trouble removing tough burnt-on spots or stains, spray the area with the vinegar spray and let it sit for 20 minutes. When you come back to it, the mess should easily wipe away.
How to Clean a Keurig Machine
Coffee Maker Cleaning Schedule
When it comes down to it, you should make it a habit to clean your coffee pot. Below you will find a general schedule and timeline. We added our coffee maker to our cleaning schedule in our Google calendar, so we have reminders to do the less frequent cleaning. I found it actually gets done if I put it on my calendar. Everyone works differently, but I just thought I’d give you the idea.
Daily Cleaning or After Each Use:
Any removable parts of the coffee maker should be removed and cleaned daily or after each use. Take a look at your user manual to familiarize yourself with the parts and cleaning instructions for your specific machine.
Weekly Cleaning:
It’s good to get in the habit of wiping down your coffee pot once a week. The wipe down is easy and doesn’t take long. Splashes of coffee and other things from nearby cooking can build-up on the body of the machine. I typically do it when I do a deep clean of my kitchen counters. It’s become a part of that routine and easy to remember now.
Bi-Monthly Cleaning:
For those of you who have water filters, the typical recommendation for replacement is about every two months for everyday use.
Three to Six-Month Cleaning:
Descaling Your Coffee Maker
Every three to six months, you should be descaling your coffee maker. Descaling is especially important to do if you have hard water in your home. Deep cleaning your coffee maker by removing limescale build-up will extend the life of your brewer. Depending on the frequency of use and water conditions, you will need to adjust the time table for descaling your machine. We have hard water in our house, so we tend to schedule descaling every three months.
How to Descale Your Coffee Maker
Enjoy That Fresh Cup of Joe
So that’s it. That is everything you need to know about how to clean your coffee maker. After learning all about the grossness that the coffee maker can harbor, we never let it get neglected. It’s now a part of our regular cleaning schedule, and our coffee has never tasted better.
How often do you clean your coffee maker? Does it get neglected, or are you on top of it? Let us know in the comments. We’d love to hear from you!
Leave a Reply