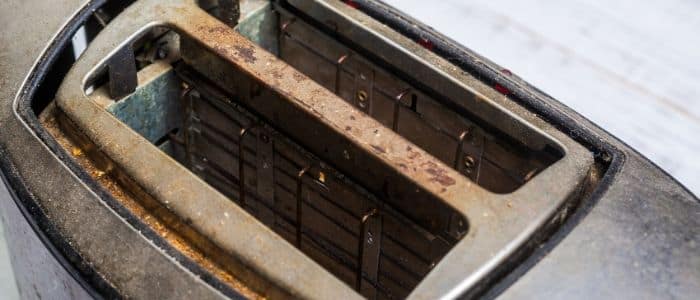
When it comes down to it, most people don’t typically remember to clean their toaster regularly. I know we fall into this category, and we are actively trying to be better about it by adding it to our cleaning schedule. Are you like us? Trust me; I’m not the judging type. This is how my relationship with my toaster goes: I’m usually just waking up when I stumble over to the toaster. I put the bread in and wait until it pops up. I butter and eat my toast. Then, I go looking for my caffeine fix – never to think about the toaster again.

Then, as luck would have it, I found an article that mentioned how toasters, as a heat-producing appliance, contribute to cooking and electrical related house fires. Apparently, if not properly cleaned and maintained, toasters can become a fire hazard. So just like every other article out there that scares me to death and makes me fear for my family’s life, I added it to my regular schedule of things to do.
Now that we have added the toaster into our cleaning routine, it gets cleaned when we do our weekly deep clean of the kitchen counters. We clean all of our other small kitchen appliances at this time as well.
YOU MAY ALSO LIKE
How to Clean an Instant Pot
How to Deep Clean a Toaster

So let’s get into how to properly clean your toaster and the supplies you are going to need to do so. I recommend doing this near a sink with a garbage disposal. That way, all your crumbs can be easily rinsed down the drain. If you don’t have a garbage disposal, I would do this over some newspapers or on a cookie sheet. This way, the crumbs don’t go everywhere. Trust me there will be more crumbs than you think. The first time I deep cleaned my toaster was, well, let’s just say it was eye-opening.
You’ll Need:
This whole process should only take around 15 minutes, depending on how long it’s been since the last time you cleaned your toaster. Follow these simple steps to properly clean your toaster and prevent it from becoming a fire hazard.
- Unplug your toaster. Do not do any of these processes while your toaster is still plugged in! You will be in danger of getting shocked or electrocuted since there will be water near the toaster.
- Set the toaster in your empty, dry sink or on a cookie sheet to keep the crumb mess contained.
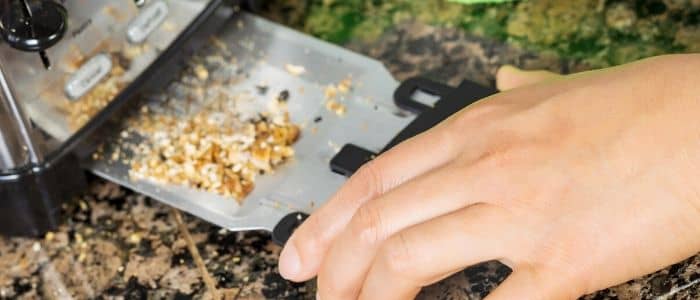
- Pull out the crumb tray. Depending on the type of toaster you have, the tray could slide out or pop out like a swinging door. Either way, almost all toaster crumb trays are easy to remove for cleaning.
- Gently shake off the crumbs into the sink or onto the cookie sheet.
- With the crumb tray out, gently shake your toaster to free any loose crumbs inside. You can gently pat the toaster with the palm of your hand to encourage crumbs to shake loose.
- Repeat step 5 a few times, but each time turn it on a different side. Doing so will get crumbs out of all kinds of crevices inside the toaster. Shake it upside-down and tilt it around until crumbs stop falling out. This process can get a little messy.
- Once all the crumbs are free, take a small brush or toothbrush to gently clean the heating elements. Do not apply firm pressure. Only brush gently left to right, not up and down. You can damage your heating elements if you’re too rough. The key to this is to remove any stuck crumbs or debris clinging to the heating elements.
- Take the crumb tray to a sink and wash it with a soapy, wet sponge or rag.
- Gently scrub the tray to remove any dried, burnt-on, and stuck crumbs.
- Once the crumb tray is clean, dry off with a towel, and set aside.
- Now it’s time to clean the actual toaster body. Before doing so, I will remind you DO NOT submerge your toaster in the water. The toaster has electrodes that, if exposed to water, can be damaged, and the toaster will no longer function. DO NOT get the inside of your toaster wet. Only wipe down the exterior of the toaster.
- If the exterior of your toaster is metal, you can take a washcloth with a bit of white vinegar and use it to wipe down the metal surfaces. The acidic nature of the vinegar will remove any spots or burns on the surfaces. After the toaster is scrubbed, then take your damp sponge and wipe down the toaster to remove any leftover vinegar on the toaster.
- If the exterior of your toaster is plastic, take the sponge with warm water and a bit of dish soap and use it to wipe down the toaster. Scrub with firm pressure on any areas that may have dried food or spots. Once complete, rinse the sponge and wring it out. Then wipe down the toaster to remove any soap residue on the exterior.
- Allow the toaster to air dry. Ensure the toaster is completely dry before plugging back in or using.
- Once the toaster and crumb tray are completely dry, reinsert the crumb tray back into the toaster.
That’s it! You’re finished cleaning your toaster. It’s not a ton of work, but it’s a task that should be done regularly.
Sanitize Toaster After Cleaning

After deep cleaning your toaster, it’s good to get into the habit of also sanitizing the inside. Don’t worry. It’s super easy to do. You do so basically by running the toaster on its hottest setting. Just follow these steps, and you’ll be good to go.
- Turn your toaster to the darkest toast setting.
- Pull down the handle and allow the toaster to get its hottest.
- Once the handle pops up, repeat the process one more time.
Once you have run the toaster twice on its hottest setting, your toaster is sanitized. The heating elements will have killed and burned away anything left from the cleaning process.
Cleaning Schedule for Your Toaster
Adding toaster maintenance to your cleaning schedule is a smart thing to do. Let’s face it, almost all of the kitchen appliances have a potential danger of catching fire, but we can do our due diligence to prevent that from happening. Putting a toaster on your regular cleaning schedule is a pretty easy thing to do. So here is what most manufacturers recommend when it comes to cleaning a toaster.
Weekly Cleaning: It’s recommended to clean out your crumb tray and wipe down the toaster once a week if your household is a daily user of your toaster.
Monthly Cleaning: It’s recommended to clean your crumb tray and wipe down the toaster once a month if you do not use your toaster on a regular basis.
When Should You Replace a Toaster
The great thing about toasters is that they are not expensive kitchen appliances and can be replaced relatively inexpensively. There are a few things you should keep an eye on to know when to throw out your toaster and get a new one. It’s a terrible idea to keep using a faulty toaster. Doing so could result in a house fire. I know that’s an extreme example, but it can happen. So here are some tips to know when to replace your toaster.

- Age: Toaster life spans are only supposed to be six to eight years. If your toaster is older than this, it’s probably time to look for a new one.
- Damaged plug or cord: If the plug or cord to your toaster is frayed or damaged in any way, throw it out and do not use it.
- Rust: If you can see rust anywhere on your toaster, it’s time to get rid of it. Corroded pieces of metal can fall into your food, and you don’t want to eat rusty metal.
- Running hot: If your toaster is burning your toast even on the lowest setting, there is something wrong. This type of issue is something you don’t want to mess with – time to throw it out.
- Won’t heat: This is the opposite of the last issue. If your toaster isn’t getting as hot as it should be, then it likely means that the heating elements are going out. If it is taking two cycles to get your bread toasted, then it’s a good sign that the toaster is on its way out.
- Uneven toasting: Uneven toasting on your bread is a sign that your heating elements are going out in your toaster. If one side is perfect, and the other isn’t toasted, it’s time to get a new toaster that will toast properly.
- Sparks: If you see any sparks at any time, even if they are tiny sparks. Unplug the toaster and throw it away immediately. This is a fire hazard, and you don’t want to mess around with that.
Nice and Toasty!
Now that you know how to clean a toaster properly, it’s time to add it to your cleaning routine. Doing so will keep your toaster clean and the risk of fire will be significantly decreased. Also, another safety note: don’t walk away from the toaster while it is in use. Keep an eye on it and stay in the same room until the food is out of the toaster. It just takes that one time for something to happen while you aren’t looking.

This article is not meant to scare you and make you think your toaster is going to burst into flames the next time you push down that lever. I just want you to be aware that things happen, and being safe in your house should be the number one concern.
Have you run into issues with your toaster? Or do you have other ways you clean your toaster? Leave us a comment below. We would love to hear from you!


Leave a Reply